

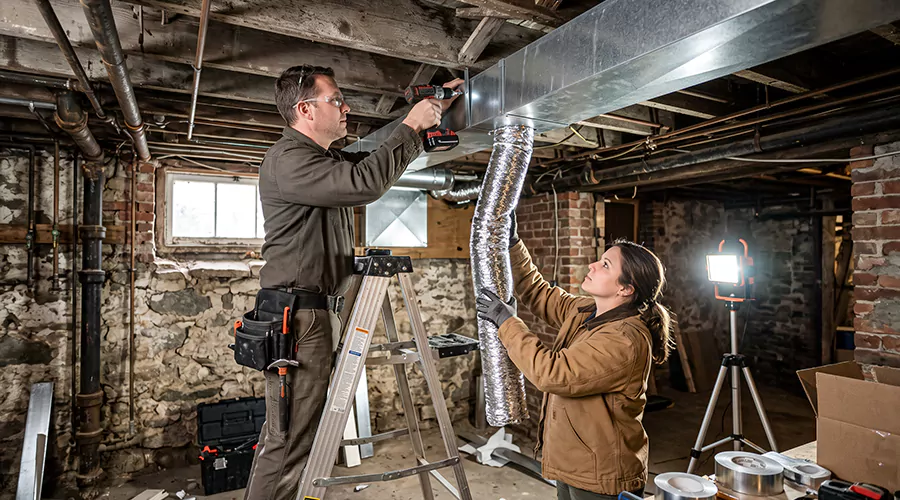
Installing ductwork in an older home begins with evaluating the building's heating and cooling needs, identifying available routes, and designing a supply and return air system that fits the existing structure. Professional air duct installation involves installing correctly sized ducts, registers, and equipment connections while protecting structural framing and older building materials. The completed system should be sealed, insulated where necessary, and tested for airflow and leakage.
Many older homes were built without central air conditioning or conventional forced-air heating. Instead, they may use radiators, baseboard heaters, or individual room units. Adding ductwork to these properties can make central heating and cooling possible, but the installation is often more complicated than work in a newly constructed house.
Older buildings may contain narrow wall cavities, limited attic clearance, or finished ceilings that were never intended to accommodate large air passages. Decorative moldings and other architectural features can also make new openings difficult to position. The installer must find routes that provide adequate airflow without causing unnecessary structural damage.
A successful installation requires planning the entire distribution system rather than fitting individual ducts wherever space happens to be available. Supply ducts must deliver the required amount of air to each room, while return ducts must provide a suitable path back to the HVAC equipment. The design should also account for the building's insulation, air leakage, and existing heating arrangements.
Can You Install Central HVAC Ductwork in an Older Home?
Yes. Many older houses can accommodate a new ducted heating and cooling system, although the installation method depends on available space and building construction. Some homes have accessible attics or basements that allow ducts to reach rooms with relatively limited disruption. Others require dedicated chases or carefully planned openings through finished areas.
The contractor should first determine whether a conventional duct system is practical. A suitable installation needs enough room for correctly sized supply and return passages, not simply small openings through existing framing. Ducts that are squeezed into unsuitable spaces can become restrictive and may prevent the equipment from delivering enough air.
If the home cannot accommodate conventional ductwork without extensive construction, other HVAC approaches may deserve consideration. Ductless mini-split heat pumps can condition rooms without installing a whole-house air distribution network. The Department of Energy identifies them as an option for homes that do not already have ducts.
The appropriate choice depends on the home's layout and comfort requirements. A ducted system may be suitable when the distribution routes are available, while a ductless or small-duct arrangement may reduce building disruption in some properties.
What Makes Duct Installation Difficult in Older Homes?
Older properties often have construction features that limit installation space. Wall cavities may be too narrow for the required duct sizes, and floor framing can restrict routes between rooms. Finished surfaces can also make access costly.
The difficulty varies considerably between houses. A traditional home with a spacious unfinished basement may provide useful routes for main ducts. A similar-sized house with finished ceilings and limited attic access can require extensive planning and restoration.
Limited Wall Space
Standard wall cavities may not accommodate large rectangular or round ducts. This is particularly important for return air because a return passage may need to carry more air than an individual supply branch. Forcing an undersized duct into a narrow cavity can create resistance and system noise.
The contractor may need to use a dedicated chase, soffit, or alternative duct route. Structural members should not be cut merely to provide additional space. A proper design should account for the framing before new openings are created.
Finished Ceilings and Decorative Features
Older homes may contain plaster ceilings, decorative trim, or other finishes that are difficult to restore after demolition. New ducts running between floors can require openings through these surfaces. The cost of restoration may become a substantial part of the project.
A contractor should investigate routes through closets or other less visible areas before proposing extensive demolition. However, an inconvenient location should not be chosen if it produces an excessively long or restrictive duct path. The route must remain suitable for airflow.
Multiple Floors
Multistory older homes present additional challenges because conditioned air must travel between levels. Vertical trunks or branches may need dedicated shafts. Existing framing and utility passages can limit the available locations.
A central system may also need zoning or separate equipment when different floors have substantially different heating and cooling demands. The design should be based on actual loads rather than an assumption that one thermostat and one duct layout will provide equal comfort everywhere.
Older Building Materials
Older properties may contain materials requiring special precautions during renovation. Asbestos-containing insulation and lead-based paint are important concerns in certain buildings. Cutting into suspect materials without assessment can create hazardous exposure.
The Environmental Protection Agency recommends having suspected asbestos-containing material evaluated by a qualified professional before renovation work disturbs it. For homes built before 1978, lead-safe renovation requirements may also apply when painted surfaces are disturbed. These considerations should be addressed before demolition begins.
What Should You Check Before Adding Ductwork?
The initial assessment should consider the building envelope, existing equipment, and available installation space. Installing new ducts does not automatically correct poor insulation or major air leakage. Those conditions can affect the amount of heating and cooling required.
A qualified contractor should gather enough information to develop a suitable design rather than begin by selecting duct sizes from the number of rooms. The work should also account for the home's construction and any existing mechanical systems.
Heating and Cooling Loads
The required capacity of the HVAC system should be established through appropriate load calculations. ACCA Manual J is a recognized method for residential heating and cooling load calculations. It considers building characteristics that affect how much heating or cooling individual rooms require.
An older home with single-pane windows and limited insulation may have different loads from a similar-sized house that has been upgraded. The contractor should use the home's actual condition rather than assume a standard capacity based on square footage. Proper load calculations support both equipment selection and duct design.
Existing Insulation and Air Leakage
Older homes may contain insufficient insulation or significant gaps around windows, doors, and attic penetrations. These conditions can affect indoor temperatures and equipment requirements. Addressing major building-envelope problems before sizing the new HVAC system may reduce the amount of heating and cooling needed.
For example, improving attic insulation may change the cooling load for rooms beneath the roof. A contractor should account for planned improvements when developing the design. Installing oversized equipment before insulation upgrades can create avoidable performance problems.
Existing Heating Equipment
A house with radiators or a boiler may already have an effective heating system but lack central air conditioning. The homeowner should decide whether the project involves adding cooling only or replacing the entire heating arrangement. These decisions affect equipment and duct requirements.
A heat pump can provide heating and cooling through a compatible duct system, while a central air conditioner generally provides cooling and uses a separate heating source when heating is needed. Equipment selection should be coordinated with the new distribution layout.
Available Mechanical Space
The HVAC equipment needs an appropriate installation location with access for service. Depending on the building, an air handler may fit in a basement, utility room, attic, or approved closet. The location influences how main supply and return ducts can be routed.
Equipment must have the necessary clearances, drainage, electrical connections, and other required provisions. Choosing a location solely because it is hidden can create difficult maintenance conditions. The duct design and equipment placement should be considered together.
What Type of Ductwork Is Best for an Older House?
The best material depends on the available space and the airflow required. Rigid sheet metal is often used for main trunks because it maintains its shape and can be fabricated into different sizes. Insulated flexible ductwork can be suitable for selected branches where there is enough clearance for gentle bends and adequate support.
Some older homes may benefit from a compact duct layout designed to reduce the total length of the distribution network. The Department of Energy's Building America guidance recommends considering short, direct routes and appropriate room airflow. However, compact layouts must still provide correctly sized ducts and suitable return pathways.
| Ductwork Option | Potential Application | Main Limitation |
|---|---|---|
| Rigid sheet metal | Main supply and return passages | Can require larger chases and fabrication |
| Insulated flexible duct | Accessible attic or crawlspace branches | Requires sufficient clearance and support |
| Fiberglass duct board | Suitable plenums and approved ducts | Sensitive to moisture damage |
| Compact duct layout | Certain retrofit designs | Requires proper room-by-room design |
| Specialized small-duct HVAC system | Homes with limited conventional duct space | Requires compatible equipment and specialist design |
| Ductless mini-split system | Homes where duct routes are impractical | Different room-unit and distribution arrangement |
A contractor should explain why the proposed material suits the location. Flexible duct should not be compressed into an ordinary wall cavity that is too small for its full diameter. A smaller duct is not automatically acceptable simply because it fits behind an existing finish.
Where Can You Run New Ductwork in an Older Home?
The most practical routes often use attics, unfinished basements, closets, or other accessible building spaces. The installation should avoid unnecessary disturbance of finished rooms while maintaining suitable airflow. When possible, ducts should be located within conditioned space to reduce unwanted heat transfer.
Through an Attic
A spacious attic may provide room for main supply ducts and branches connecting to ceiling registers. The contractor can often access several rooms from above, reducing the need to open finished walls. This approach is common in single-story homes.
However, attic ducts may be exposed to significant temperature differences. Appropriate insulation and sealing are necessary, particularly in unconditioned vented attics. The installer should also protect the ducts from crushing and avoid disturbing potentially hazardous older insulation.
Through an Unfinished Basement
An unfinished basement can provide a route for rigid main ducts and branches connected to floor or wall registers. Exposed ceiling framing may make installation easier than routing through finished living areas. The contractor should still evaluate structural and utility clearances.
Ducts should not interfere with required access to plumbing or electrical systems. Suitable transitions may be necessary where the framing restricts the available height. The layout should remain appropriate for both supply and return airflow.
Through Closets or Dedicated Chases
Closets and dedicated vertical chases can provide routes between floors in older homes. A contractor may use these locations to position a trunk duct without opening a large portion of the living room or hallway. This can reduce visible alterations when the available space is sufficient.
However, a duct chase needs proper construction and may require fireblocking or other code-compliant details. The surrounding area should remain accessible where equipment or dampers need maintenance. A narrow closet should not be used if the duct cannot maintain its required size.
Through Finished Ceilings
A new soffit or dropped ceiling may provide space for ductwork where no existing cavity is large enough. This approach changes the room's appearance but can avoid cutting structural joists. The contractor should coordinate the duct route with lighting and other ceiling components.
Ceiling height and architectural details can limit the suitability of this method. Any new enclosure should comply with applicable building and fire-safety requirements. The homeowner should review the proposed soffit dimensions before construction.
How to Install Ductwork in an Older Home Step by Step?
Installing a new duct system in an older property requires coordination between HVAC design and building renovation. The process should begin before walls or ceilings are opened. The following steps describe a typical professional retrofit.
Step 1. Inspect the House and Existing HVAC Systems
The contractor examines the building's construction and identifies available routes for ducts. Existing heating equipment, electrical systems, plumbing, and accessible framing are reviewed. Rooms that experience substantial temperature differences should also be documented.
The inspection should determine whether the home already contains any usable ducts or return pathways. Old components should not be assumed suitable simply because they are present. Their condition and capacity must be evaluated before reuse.
Step 2. Assess Building Materials and Hazards
Before cutting into older finishes, determine whether the work could disturb asbestos-containing insulation or lead-based paint. A qualified specialist should assess suspect asbestos materials when disturbance is planned. Appropriate lead-safe procedures may also be required for painted surfaces in older housing.
The contractor should identify these concerns during planning rather than after demolition has started. Hazardous-material work may require separate personnel and scheduling. Homeowners should receive a clear explanation of any additional precautions.
Step 3. Calculate Room-by-Room Heating and Cooling Loads
Use appropriate calculations to determine the heating and cooling requirements of the building. ACCA Manual J provides a recognized method for evaluating these loads. The calculations should reflect actual insulation, windows, building orientation, and planned improvements.
Each room may require a different amount of conditioned air. A simple rule based on room count can produce inadequate distribution. Load calculations provide a basis for selecting suitable equipment and duct sizes.
Step 4. Select Compatible HVAC Equipment
Choose heating and cooling equipment that suits the home's calculated loads and installation conditions. The blower must be able to deliver the required airflow through the proposed duct network. Equipment placement also affects the length and resistance of the main ducts.
A suitable system should not be oversized merely to compensate for poor insulation or restrictive duct routing. The contractor should coordinate equipment selection with duct design. ACCA Manual S provides recognized guidance for selecting residential HVAC equipment.
Step 5. Design the Supply and Return Duct Layout
Develop a duct plan using recognized residential design methods such as ACCA Manual D. The layout should identify main trunks, branches, register positions, and return pathways. It must also account for effective duct length and pressure losses through fittings.
A return system is particularly important because the blower must receive adequate air. Department of Energy guidance recommends fully ducted returns rather than relying on leaky framing cavities. The contractor should also consider how air returns from rooms when interior doors are closed.
Step 6. Identify the Best Installation Routes
Compare attic, basement, closet, and ceiling routes before choosing the final layout. A good route balances airflow requirements with the need to protect existing finishes. It should avoid unnecessary turns and inaccessible sections.
Structural framing should not be cut simply to accommodate a duct. If a proposed route conflicts with joists or beams, the design should be modified or reviewed by an appropriately qualified professional. Safe construction is a requirement, not a minor installation preference.
Step 7. Confirm Permits and Building Requirements
Local authorities may require mechanical permits and inspections for new HVAC duct systems. Additional requirements may apply when the project alters structural elements or fire-rated assemblies. The contractor should verify these rules before work begins.
The installation should also satisfy adopted energy codes for duct insulation and leakage. Older buildings may have different existing conditions, but new work must still meet applicable requirements. Permit and inspection responsibilities should be identified in the written quote.
Step 8. Prepare the Building Access
Create the approved access openings needed for equipment, trunks, and branches. The work should be planned to minimize unnecessary removal of plaster or drywall. Protect the occupied rooms from construction debris using appropriate barriers and work practices.
Older decorative elements should be removed or protected carefully when they are near the installation area. Any required restoration should be included in the project plan. Temporary openings must remain safe while work is underway.
Step 9. Install the HVAC Equipment and Plenums
Position the furnace or air handler according to the design and manufacturer's instructions. Suitable supply and return plenums connect the equipment to the duct network. Their dimensions and configuration should support the required airflow.
Electrical and refrigeration connections must be completed by appropriately qualified personnel. Gas or combustion exhaust components require separate safety procedures. The equipment should remain out of operation until the duct connections are complete.
Step 10. Install Main Supply and Return Ducts
Place the main trunks along the planned routes and secure them with suitable mechanical supports. Rigid metal ducts are commonly used where a stable shape and larger airflow capacity are needed. Fittings should avoid unnecessary restrictions.
The return network should connect intended room-air openings to the HVAC equipment without drawing air from unintended building cavities. A return duct that pulls air from an attic or unconditioned wall cavity can introduce unwanted particles and temperature differences. All appropriate seams and connections should be sealed.
Step 11. Install Branch Ducts and Registers
Connect the branch ducts to their intended room outlets. The installation should maintain the correct size and orientation at each fitting. Flexible branches must remain extended and supported without excessive loops or compression.
Register placement affects how conditioned air moves through a room. The contractor should select outlets and positions appropriate for room airflow rather than place every register wherever cutting is easiest. ACCA Manual T provides guidance on residential air distribution and outlet selection.
Step 12. Seal All Duct Connections
Duct joints should be mechanically secured and sealed using suitable HVAC mastic or approved closure materials. Ordinary cloth-backed duct tape should not be relied upon for long-term sealing. Air leakage can reduce the amount of conditioned air reaching rooms and change system pressure conditions.
Supply and return connections deserve equal attention. A supply leak releases conditioned air, while a return leak can draw air from unfinished spaces. The contractor should inspect joints before they are covered by insulation or construction finishes.
Step 13. Install Duct Insulation
Ducts outside conditioned space generally need suitable insulation under the applicable code. An unconditioned attic may require more attention to heat gain and condensation than a duct inside the home's thermal boundary. The contractor should specify the intended insulation rating.
Insulation must remain continuous around fittings and connections. Compression and gaps can reduce thermal performance. Where a vapor barrier is required, it should be restored after the air connection is completed.
Step 14. Test for Leakage and Airflow
Before closing access openings, the contractor should check the system for air leakage. Duct pressurization testing may identify openings that are not obvious visually. The results should meet applicable requirements for the project.
The contractor should also evaluate system static pressure and room airflow. A properly installed duct network should deliver the amounts established by the design. If significant restrictions are identified, they should be corrected before finishes make access difficult.
Step 15. Balance the Distribution System
Room airflow may need adjustment after the ducts and equipment are installed. Balancing dampers can help distribute air according to the design. The objective is not identical airflow at every register because rooms have different heating and cooling requirements.
The contractor should check performance in relevant operating modes. A system serving multiple floors may need particular attention to temperature differences and return pathways. Adjustments should be documented for future maintenance.
Step 16. Restore Building Finishes
Close construction openings and restore disturbed ceilings, walls, or floors according to the project scope. Fireblocking and required fire-rated assemblies must be completed using approved methods. Finished surfaces should not conceal known duct defects.
The homeowner should inspect the restoration before accepting the project. A well-installed HVAC system should not leave unsafe penetrations or unnecessarily damaged architectural features. Restoration responsibilities should already be clear in the contract.
Step 17. Complete Final Equipment Checks
Operate the HVAC system after the installation and building work are complete. The technician should check normal equipment operation, condensate drainage where applicable, and airflow at the room outlets. In homes with fuel-burning equipment, appropriate combustion safety verification may be necessary.
The homeowner should receive the equipment and duct documentation, including maintenance instructions and available test results. This provides a useful reference for future service appointments.
How Do You Install Ductwork Without Destroying Existing Walls?
The most effective approach is to plan routes through spaces that are already accessible. An unfinished attic or basement may provide room for main ducts and branches without opening large sections of finished walls. Closets and existing chases can sometimes accommodate vertical passages.
A contractor may also create a soffit or dropped ceiling to contain ducts rather than cut through structural framing. The final appearance should be discussed before construction begins. Architectural features may influence the placement and dimensions of the new enclosure.
However, not every home can receive conventional ductwork without some demolition. The required duct size must be respected, and return pathways need sufficient space. When the available routes are unsuitable, a different HVAC system may be more practical.
Do Older Homes Need Return Air Ducts?
Yes. A new forced-air system needs an appropriate return pathway so air can circulate back to the HVAC equipment. Relying on supply ducts alone can create pressure differences and limit airflow. A central hallway return may also be insufficient for some layouts when interior doors are closed.
The Department of Energy recommends fully ducted returns rather than relying on wall studs or panned floor joists as return passages. Building cavities can be difficult to seal and may draw air from unintended areas. A new installation should avoid creating such problems.
A contractor may specify dedicated returns or properly designed transfer pathways to balance pressure between rooms. Their sizes should be calculated rather than selected only by appearance.
Is Flexible Ductwork Suitable for Older Homes?
Flexible ductwork can be useful for branches in accessible attics and crawlspaces. It may reduce the number of rigid fittings needed for a suitable route. However, it still requires enough space to maintain its full diameter and insulation thickness.
Forcing flexible duct through a narrow wall cavity can produce compression and substantial airflow resistance. Long sagging runs also reduce performance. The installer should follow manufacturer requirements and Department of Energy guidance for support spacing and bends.
A mixed system of rigid metal trunks and insulated flexible branches may be appropriate when the design supports it. The correct approach depends on the building's available routes.
What if an Older Home Has No Space for Conventional Ducts?
A conventional ducted system may not be the best choice when installing suitable passages would require extensive removal of important structural or architectural features. The contractor should identify these limitations during the initial assessment. Alternative HVAC configurations may provide heating and cooling with less building disruption.
Ductless mini-split heat pumps are one option for homes without existing ductwork. They use indoor units connected to outdoor equipment rather than a central network of full-size ducts. The Department of Energy identifies this technology as a practical retrofit approach for many such homes.
Specialized small-duct systems may also be considered in certain projects, but they require compatible equipment and a properly engineered distribution design. They should not be confused with installing undersized conventional ducts. The homeowner should compare the complete cost and suitability of the available options.
How Much Does It Cost to Install Ductwork in an Older Home?
HomeGuide estimates approximately $2,400 to $6,600 for installing new ductwork in a house without existing ducts. Angi's 2026 installation guide places many residential ductwork projects between $2,000 and $7,500, with larger installations reaching $12,000 or more. These ranges provide preliminary benchmarks rather than guaranteed costs for older homes.
A finished older house may require more work because the contractor must open building surfaces and route ducts around existing construction. Complex multistory layouts and decorative restoration can increase the total. The need for specialized material assessment may also affect the budget.
| Project or Expense | Indicative Cost or Pricing Approach |
|---|---|
| New residential ductwork retrofit | $2,400–$6,600 |
| Many residential installations in 2026 | $2,000–$7,500 |
| Large or complicated installation | $7,500–$12,000 or more |
| New retrofit ductwork per linear foot | $40–$65 in one published model |
| Combined HVAC equipment and ductwork retrofit | $7,000–$16,000 for certain projects |
| Plaster, drywall, and other finish restoration | Separate estimate when not included |
| Hazardous-material assessment or remediation | Depends on documented conditions |
The combined HVAC equipment and ductwork estimate is a different project category from duct installation alone. These amounts should not be added automatically. A contractor should specify whether the quote includes equipment, ducts, building restoration, and required permits.
The most reliable budget comes from an inspection and a defined installation layout. Two older homes with similar square footage may require very different amounts of construction work.
How Long Does It Take to Install Ductwork in an Older House?
Installation time depends on how much of the building must be opened and restored. A straightforward duct system in an accessible unfinished area may be installed within a few working days. A finished multistory retrofit can take substantially longer because it involves coordination with other building work.
Design, permits, and specialized assessments may also affect the schedule before installation begins. If ceilings or walls require restoration, the complete project may extend beyond the HVAC work itself. The contractor should provide a schedule that separates mechanical installation from finishing work.
Final testing must remain part of the project. Closing walls before verifying duct leakage and airflow can make later corrections difficult and expensive.
What Mistakes Should You Avoid When Adding Ducts to an Older Home?
The largest installation problems usually begin with an inadequate design or an unrealistic assumption about available space. A duct system should not be squeezed into building cavities simply because the contractor wants to avoid construction work. The heating and cooling equipment must receive appropriate supply and return airflow.
Avoid these mistakes:
- Selecting HVAC equipment without room-by-room load calculations.
- Designing duct sizes solely from home square footage.
- Ignoring available return air pathways.
- Using unsealed framing cavities as ordinary return ducts.
- Cutting structural members without an approved design.
- Disturbing suspected asbestos-containing materials.
- Failing to follow applicable lead-safe renovation requirements.
- Routing flexible ducts through spaces that compress them.
- Creating excessive duct length and sharp bends.
- Leaving joints unsecured or unsealed.
- Omitting required insulation in unconditioned spaces.
- Choosing register locations without evaluating airflow.
- Underestimating drywall or plaster restoration costs.
- Failing to obtain applicable permits.
- Closing construction openings before leakage testing.
- Skipping final airflow balancing and equipment checks.
A careful contractor should identify these risks before installation begins. Correcting poor routing after walls are closed can require repeating demolition and restoration work. Planning reduces that likelihood.
How Can You Reduce Duct Installation Costs in an Older Home?
The first step is to determine whether the home truly needs a conventional ducted system. A ductless system may be more practical where conventional ducts would require extensive reconstruction. The comparison should consider the entire heating and cooling project rather than material prices alone.
When ductwork is appropriate, routes through accessible attics and basements may reduce disruption. Coordinating installation with other planned renovations can also limit repeated demolition and surface repairs. However, ducts should not be routed through unsuitable spaces merely to save labor.
Request itemized estimates showing duct materials, design, equipment connections, insulation, testing, and building restoration. This makes it easier to compare contractors and identify excluded work. A properly designed installation is generally more valuable than a cheaper system that cannot deliver suitable airflow.
What Should You Ask an HVAC Contractor Before Installation?
An older-home retrofit should begin with a detailed discussion of design and construction conditions. Homeowners should understand where ducts will run and what surfaces will be affected. The contractor should also explain how the return air system will work.
Ask these questions:
- Has a room-by-room heating and cooling load calculation been completed?
- What duct design method will be used?
- Where will the supply and return trunks run?
- Will existing architectural features be affected?
- Are any structural modifications required?
- Have older building materials been assessed appropriately?
- What ducts and insulation materials will be installed?
- Are new registers and return grilles included?
- Does the price include wall and ceiling restoration?
- What permits and inspections are necessary?
- Will duct leakage and room airflow be tested?
- Are ductless or alternative systems worth considering?
- How long will the complete project take?
- What warranties apply to the new work?
Written answers make contractor estimates easier to compare. They also help establish what the completed project should include before construction begins.
Conclusion
Installing ductwork in an older home requires careful planning because the building may not contain suitable routes for a conventional HVAC distribution system. The process should begin with heating and cooling load calculations, equipment selection, and a duct design that accounts for the actual construction. Supply and return ducts must be correctly sized, sealed, supported, and insulated. Older building materials and finished-surface restoration may create additional costs and safety requirements. Before starting, compare a professionally designed ducted installation with other suitable HVAC options for the home.